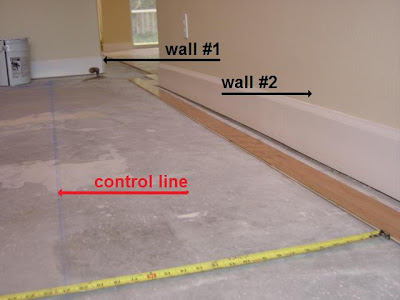
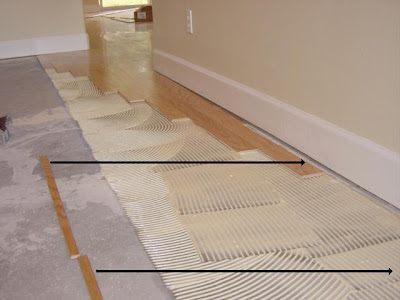
 Looking through some pictures on an older laptop dating back to 2003 I discovered some interesting ones that a story can be built around. Above is a glue down installation that ran into several rooms. In the background you can see the completed areas. At this juncture the installation dealt with following two parallel wall lines.
The furthest wall was straight forward in so far as how to deal with the last row that would be smaller than the three inch wide plank being used. Considering this is a gluedown installation the object is trying to stay off most of the area after the glue is spread. This prevents unnecessary board movement and keeps things tighter with minimal gapping.
In dealing with glued installations it's always wise to keep the areas from the wall as small as possible. In other words; keep it small so you aren't walking all over it. The area completed had been left to cure overnight. Hence there would be no board movement when working on top of it to finish off the area.
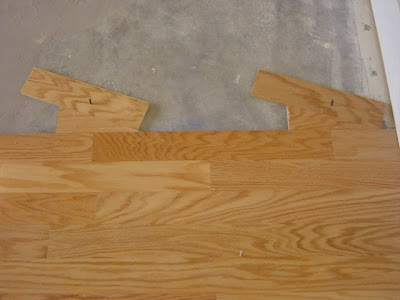
By using a control line I know where the installation "should be" once I place more and more boards on the floor. By measuring back in full three inch boards increments from the line I now have the dimensions for the pieces that will fall against wall #2. The below photo shows "fill in pieces" that will be needed along wall #2. Rather than struggling and standing on boards in the laid adhesive for the measurement I've found it ahead of time and made the necessary cuts on a table saw.

I would not suggest trying an area as challenging as this for someone just learning or doing the job on a weekend. In effect you'd probably only want to work an area about nine inches or three boards off wall #2. I've been accustomed to handling these kind of installations and know my limits.
Shown below are two neat tricks in keeping glued floors tight before the adhesive dries. The first wedging trick shows scrap pieces against the baseboard. The second takes a bit more effort by using concrete nails and getting the floor tight by tapping the cut wedges with a hammer.


