RSS
Showing posts with label DIY. Show all posts

A Fabulous DIY Project!

I was over visiting my friend Marian at Miss Mustard Seed this week and I have to tell you her recent project stopped me in my tracks.
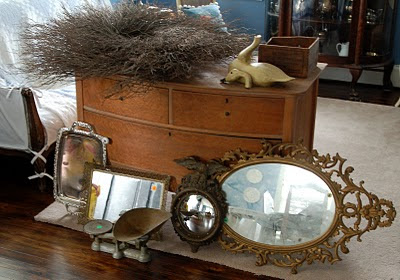
Marian took a $6.00 dresser she purchased at an auction last fall and turn it into a work of art!
The veneer was chipped and bubbled and beyond her ability to repair. So, she decided to paint it and then cover it with antique sheet music. Isn't this a wonderful effect?
And in case your feeling crafty and inspired she has more photos and the step by step instructions here.
This is only one of her many projects, so don't miss a visit to her blog, Miss Mustard Seed.
By the way, she is part of So You Think You Can Decorate Competition; so if you want to see other great projects, or vote for hers, click here.
Thanks for inspiring us, Marian!! I am off to search the attic to see what I can create!!!

  • Digg
  • Del.icio.us
  • StumbleUpon
  • Reddit
  • RSS

All the tools of the trade...


So we now have all the equipment to put up the wallpaper. Stay tuned for more before and after pictures!! Kellie xx


Photos by Kellie Collis for Ada & Darcy

  • Digg
  • Del.icio.us
  • StumbleUpon
  • Reddit
  • RSS

Sharing your tips with me! Please?!


Luke is getting himself organised to hang this wallpaper. I received some fabulous advice from Mel's Rose Place ; "One thing i found with the glue is that it stays wet for a LONG time so there is no rush in getting it all up quickly. Think that is where i went a bit wrong in that i tried to rush it believing that the glue was about to dry. Mine was a powder that you mixed up into a glue , like a cake mix!! I also found it was easier to trim once it was all dry and now being day 2 mine looks 100% better than it did yesterday."

This lovely advice made me realise, there are so many clever people out there, surely I can use your knowledge to help Luke along? I would love to hear from you if you have hung wallpaper, read anything about hanging wallpaper or perhaps you just have well something good or bad to say about it! Thank you from me and a BIG thank you from Luke in advance. Kellie xx

  • Digg
  • Del.icio.us
  • StumbleUpon
  • Reddit
  • RSS

Inspiration 1.21

From the home of the very talented and very lovely Lauren of Pure Style Home. P.S. that amazing faint spring green wallpaper, is not actually wallpaper. It was done with stencils. See how Lauren and her husband got the look here.

  • Digg
  • Del.icio.us
  • StumbleUpon
  • Reddit
  • RSS

Add a bit of twinkle to your garden. I will!


Turn an empty tin of tomatoes into a fabulous outdoor lantern - just what my little garden needs... A bit more twinkle!
What you will need:
  • Used and empty aluminium can;
  • Soapy water;
  • Felt-tip pen;
  • A pattern - we used a heart;
  • 1 metre of ribbon (the prettier the better)
  • Electric drill;
  • Narrow drill bit;
  • Safety glasses;
  • Tea-light
How to make a lantern from an aluminium can
  1. Soak tin in soapy water to loosen the label.
  2. Using the pen, mark your pattern on the side of the tin and two evenly spaced points at the rim for a ribbon handle.
  3. Insert a narrow bit into an electric drill and carefully drill a series of holes in the tin. Handle with care as the inside will be sharp.
  4. Thread ribbon through the two holes at the rim and knot.
  5. Place a tea-light inside (carefully) and hang from a branch in the garden.
AND... Wallah!! Fabulous lighting for any occassion. I perhaps will change mine up a bit with some pretty, girly ribbon!


  • Digg
  • Del.icio.us
  • StumbleUpon
  • Reddit
  • RSS

Add a bit of twinkle to your garden. I will!


west elm furniture,interior design, furnitures, office interiors


Turn an empty tin of tomatoes into a fabulous outdoor lantern - just what my little garden needs... A bit more twinkle!
What you will need:
  • Used and empty aluminium can;
  • Soapy water;
  • Felt-tip pen;
  • A pattern - we used a heart;
  • 1 metre of ribbon (the prettier the better)
  • Electric drill;
  • Narrow drill bit;
  • Safety glasses;
  • Tea-light
How to make a lantern from an aluminium can
  1. Soak tin in soapy water to loosen the label.
  2. Using the pen, mark your pattern on the side of the tin and two evenly spaced points at the rim for a ribbon handle.
  3. Insert a narrow bit into an electric drill and carefully drill a series of holes in the tin. Handle with care as the inside will be sharp.
  4. Thread ribbon through the two holes at the rim and knot.
  5. Place a tea-light inside (carefully) and hang from a branch in the garden.
AND... Wallah!! Fabulous lighting for any occassion. I perhaps will change mine up a bit with some pretty, girly ribbon!


west elm furniture,interior design, furnitures, office interiors


  • Digg
  • Del.icio.us
  • StumbleUpon
  • Reddit
  • RSS

TopOfBlogs My Ping in TotalPing.com iPing-it Add to Feedage RSS Alerts Add To Fwicki Add to Spoken to You
Preview on Feedage: interior-design-minimalis Add to My Yahoo! Add to Google! Add to AOL! Add to MSN
Subscribe in NewsGator Online Add to Netvibes Subscribe in Pakeflakes Subscribe in Bloglines Add to Alesti RSS Reader
Add to Feedage.com Groups Add to Windows Live
Feedage Grade B rated